How to take a Screenshot in Kali Linux
Last Updated :
24 Oct, 2023
Kali Linux is a Debian-based distribution with a strong focus on penetration testing, ethical hacking, digital forensics, and more. The project is maintained by Offensive Security. Unlike Debian which focuses on servers and desktop usage, Kali has a strong focus on Cyber security.
With lots of preinstalled tools for network analysis and pen-testing Kali is definitely a top choice for cyber-security professionals and enthusiasts alike. But unlike Linux distros like Ubuntu, the focus is not exactly on ease of use, so sometimes casual tasks like taking a screenshot might become a difficult task for some new to Linux users. In this article, we will be looking at “How to take screenshots in Kali Linux”.
Multiple Ways to Screenshot
Just like everything else in the Linux world, We have multiple options when it comes to taking screenshots on Kali Linux. Some are easier while others are more difficult, some are inbuilt while others need installation. Overall we have a lot of choices, let’s look at some of the most prominent ones.
Using Print Screen Key
Pressing the print screen key is the easiest way to take a screenshot on Kali Linux. When you press the print screen key it will take a full screenshot of your desktop. This image will then be saved in the Pictures folder and can be used as needed.
Step 1: Press the Print Screen key on your keyboard
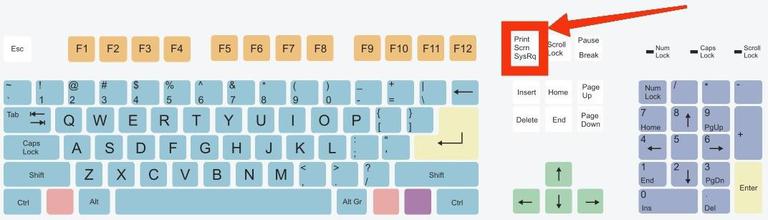
Click Print Screen Button
Step 2 : A small pop up appears on the right-hand corner

Print Screen pop-up
Step 3 : View image from the pop-up or view it directly in the Pictures folder
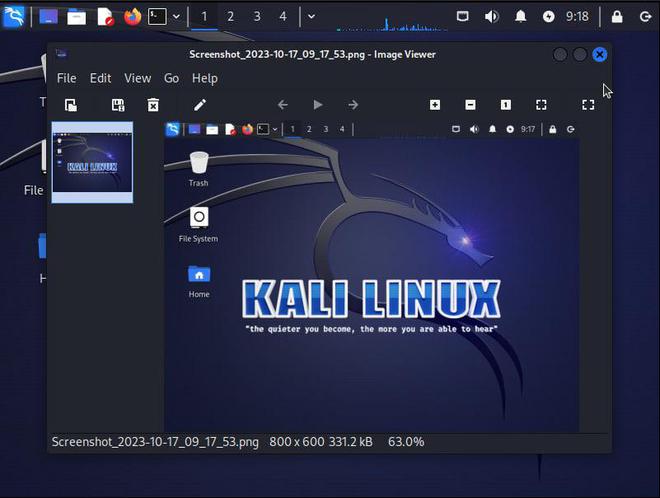
Viewing the taken Screenshot
Using Built-in Screenshot Utility
Kali Linux comes with xfce4-screenshooter application built in, this allows users to take screenshot of entire screen, the active application or a part of the whole screen. The app also provides options to delay screenshot by a few seconds and also allows for capturing the window borders and mouse pointer.
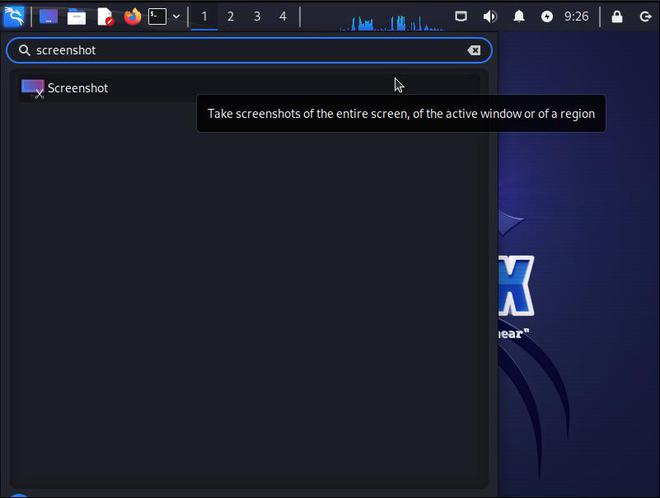
Step 1 : Press super/windows key to open the application menu
Click the super key
Step 2 : Search for the word “screenshot”

Search for “Screenshot” in App menu
Step 3 : Click on the result that appears
Click on the first result
Step 4 : This opens the xfce4-screenshooter application
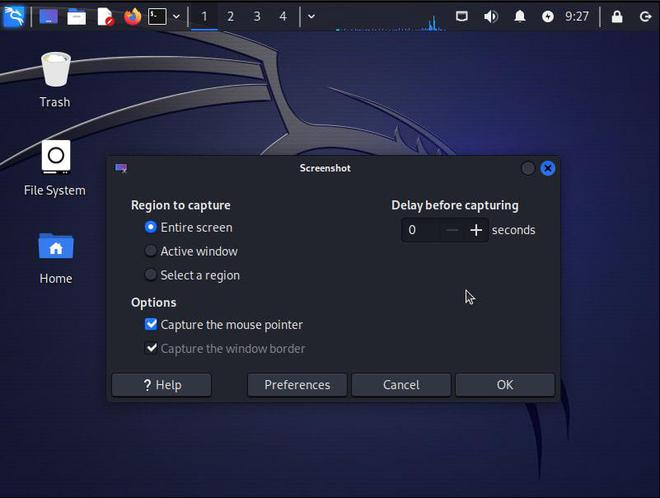
xfce-screenshooter application
Step 5 : Choose options that you need
Choose appropriate Options
Step 6 : Click OK to take the screenshot
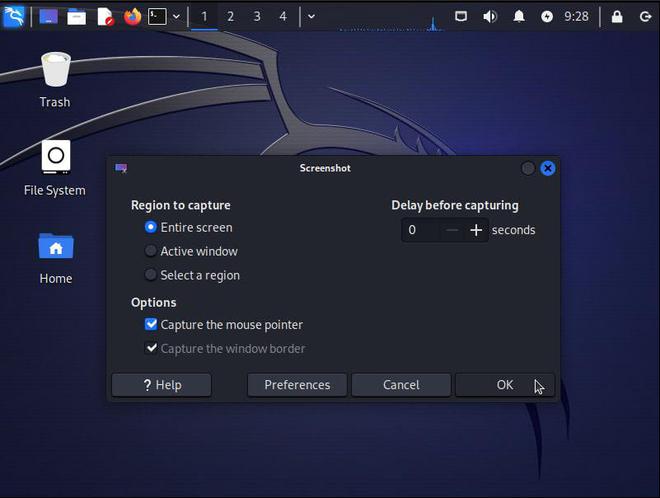
Click OK to capture screenshot
Using Other Applications
As we can see, Kali Linux does has ways to take screenshot by default. But these methods are limited in features and sometimes we might need more features from our screen capturing utility, in such case we might look into some other apps. Some of these are discussed here.
Kazam
Kazam is one of the most popular tools for screen recording and capturing on Linux. With an easy to use user interface and plenty of options to choose from Kazam is really a great tool for taking screenshots on Kali Linux. But Kazam isn’t installed by default on Kali, so users will have to install it manually from the command line and then use it.
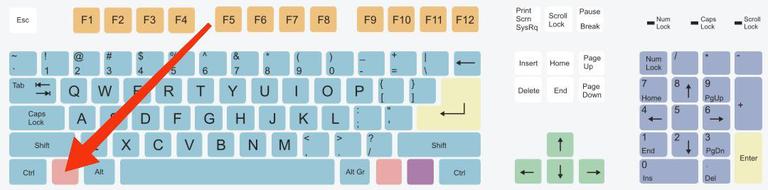
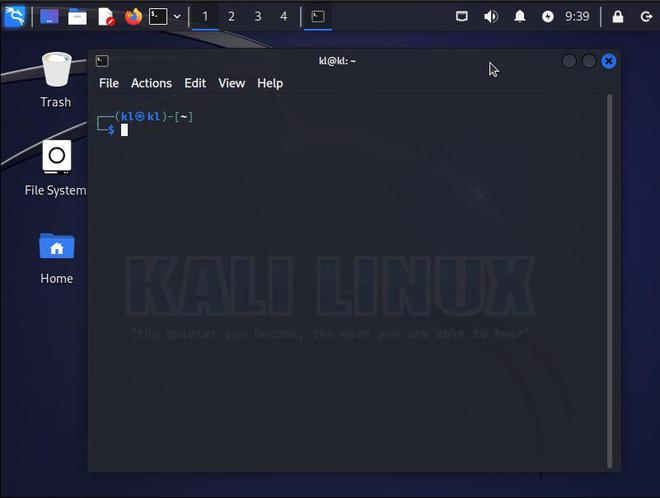
Step 1 : Open the terminal using application menu or Ctrl+Alt+T

Open up the Terminal
Step 2 : Install Kazam using the command “sudo apt install kazam” and type “y” if asked for confirmation
sudo apt install kazam
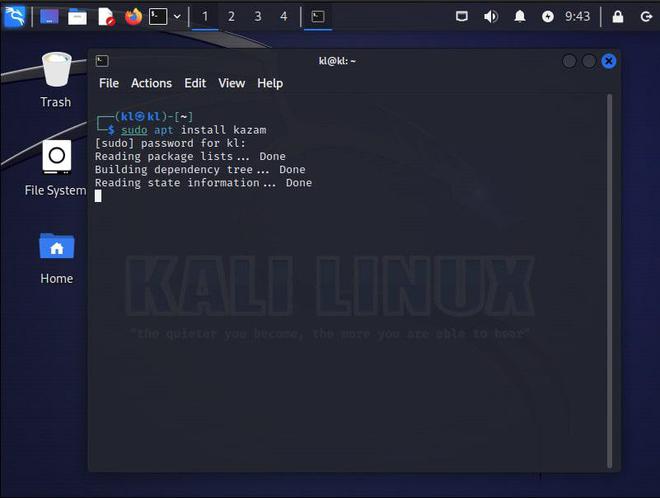
Installing Kazam
Step 3 : Click on super key to open application menu, and search and open Kazam
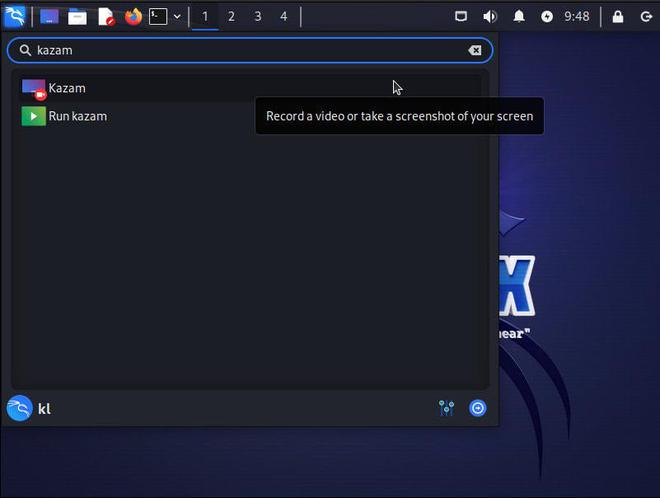
Search for Kazam in the menu
Step 4 : Choose appropriate options and click capture to capture a new screenshot
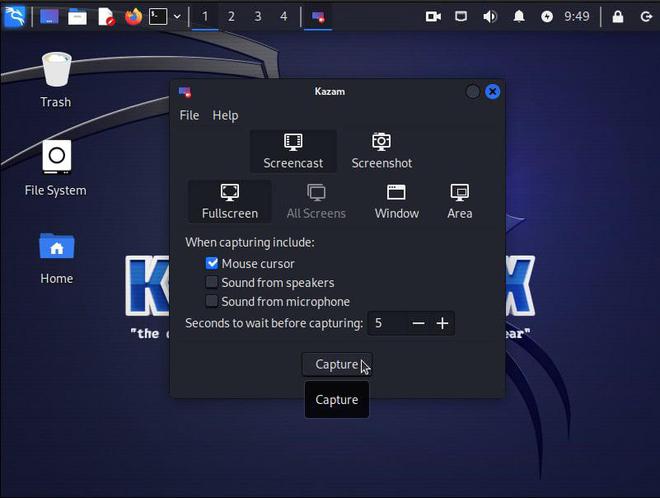
Choose appropriate options and click capture
Flameshot
Flameshot is another really popular and intuitive cross-platform screenshot tool on Linux. It is very flexible and also provides lots of in-app tools to edit the screenshots. These features include ability to customize the app, annotate pictures, add arrows, text and even blur. All this makes Flameshot a great choice for those users that want a screenshot tool, that can also do simple and quick edits to make the screenshot more useful. Similar to Kazam, Flameshot is also not installed by default on Kali Linux, but can be installed using command-line.
Step 1 : Open the terminal using application menu or Ctrl+Alt+T
Open up the Terminal
Step 2 : Install Flameshot using the command “sudo apt install flameshot” and type “y” if asked for confirmation
sudo apt install flameshot
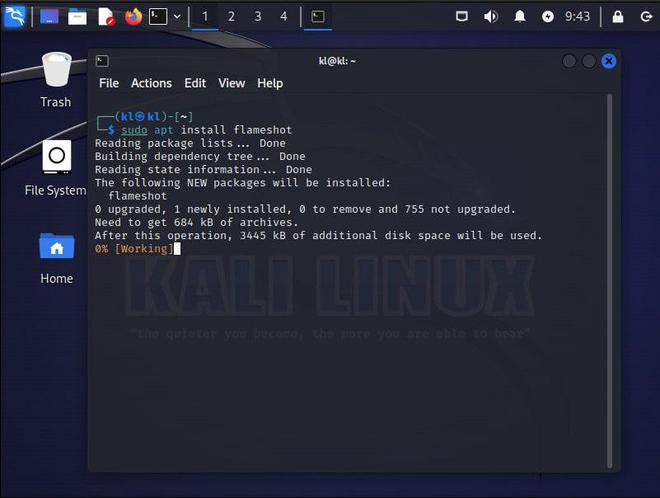
Installing Flameshot
Step 3 : Click on super key to open application menu and, search and open flameshot
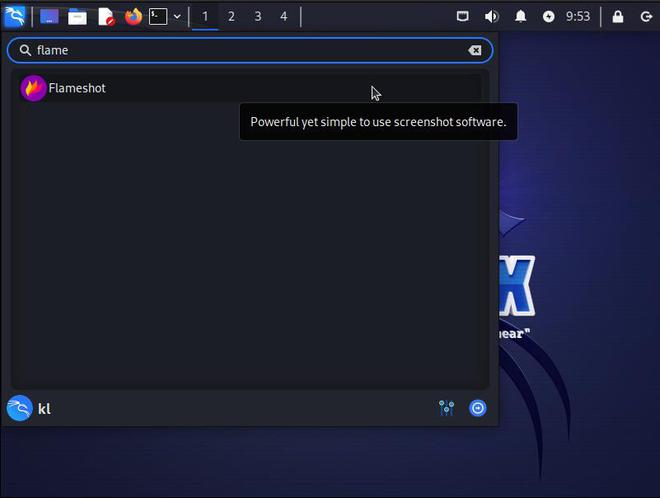
Search for flameshot from App Menu
Step 4 : Choose appropriate options and use it to capture a new screenshot
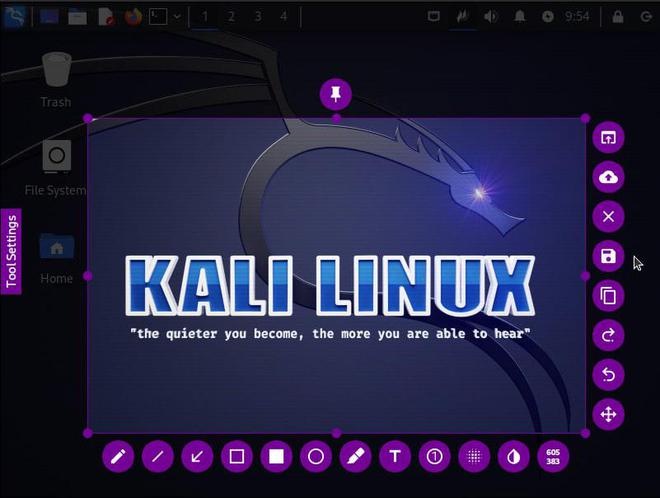
Use Flameshot to take Screenshots
Conclusion
As we saw over the course of this article, there are multiple ways to take screenshot in Kali Linux, and based on your situation one might suit you better than the other. But as a general rule of thumb:
- Use print screen and xfce-screenshooter for quick and easy screenshots
- Use other tools like Flameshot or Kazam if you want more extensive features and capabilities
Share your thoughts in the comments
Please Login to comment...